Pslzme Plugin
Installation and operating instructions - CMS Contao
pslzme (pronounced: personalize me) is a GDPR-compliant and absolutely secure personalization framework developed by us, which can already be described as a groundbreaking development in the programmatic web and enables personalization, individualization and a personal approach on the web for the first time in a secure and data-saving manner. Our system is structured in such a way that all information is packed into a simple link using the highest security measures at different security levels. So secure that our system itself does not know your data and we cannot track it either. There is also no unencrypted data transmission or storage at any time. We work exclusively with personal data that you have voluntarily published. There is neither tracking based on your data nor profiling. Pslzme only decrypts and processes your personal data if you expressly allow us to do so.
The installation, configuration and operation of the functions of the pslzme plugin are explained in detail below.
I. Installation
If you are not yet in possession of the plugin, you have the option of purchasing it via the menu section Login/Contact. Please fill out the form fields provided with an attached message to purchase the plugin. We will then contact you to transfer the required files. To integrate the plugin on your own website, you must first open the Contao Manager and the menu item “Packages”. Drag and drop the supplied .zip file of the plugin into the package folder of the manager and confirm the installation with the “Apply changes” button. Finally, confirm the installation of the database, which creates all the required tables and table fields for the plugin.
II. Configuration
Once the installation is complete, various configuration steps are required to use the functionality.
II.I Configuration of the database and the pslzme cookie banner
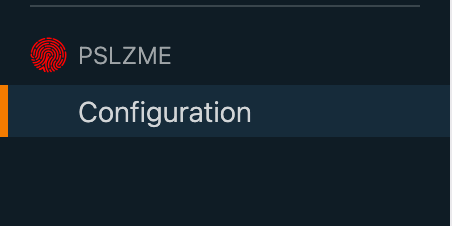
A new configuration area called “PSLZME” has been implemented in the backend of the Contao content management system. Click on the corresponding element to open it.
A configuration module is then opened, which provides various options for setting up the database and the pslzme cookie banner.
It is essential to carry out the following steps in the specified order. Precise instructions can also be found in the module itself in the detailed description.
II.I.I Configuration of the pslzme database
For the successful use of pslzme, a separate, independent database is required, which is not identical to the database on which the current Contao installation is running. To create these, you need to log in to your server hosting tool. There, navigate to the “Databases” section. Then select the “Create new database” option and enter the desired configuration data for the database name, user name and password. Ideally, a database user is created before the database is created.However, it is also possible to carry out this step retrospectively and assign the database user accordingly. To create a user, please navigate to the “Database user” section.The required configuration data, such as the user name and password, are created in this section. After successful creation, the created user must finally be assigned to the database, if this has not already been done. In order to communicate with the pslzme database, a connection to the plugin is required. In step 2 of the module, three fields for specifying the database name, user name and password are provided for this purpose.
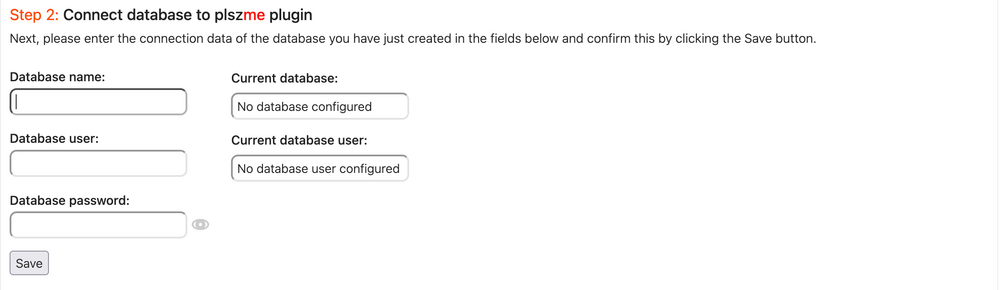
Enter the data for the newly created database there and then confirm this by clicking the Save button. Provided that your database details are correct, you should now see the name of the database and the database user in the “Current database” and “Current database user” fields provided. In the next step, the required pslzme database tables are created. The process of creating the tables is fully automated. To do this, please confirm the “Create tables” button in step 3 below.
II.I.II Licensing of the domain
The use of plszme is commercial. A license for your domain is therefore required for use. Please note that the plugin cannot be used without a corresponding license. If you do not yet have a pslzme account, you can also request one at the menu section "Login/Contact". As a rule, this will be provided by us when you first contact us to purchase the plugin, unless you request otherwise. After your account has been provided, please confirm the “Register domain” button to license your current domain.

After successfully registering your domain, you should see the text “URL successfully licensed” in the dialog box.
II.I.III Connection of internal pages to the pslzme cookie banner
As already mentioned, pslzme is fully GDPR-compliant. This means that the functionality of the plugin is used exclusively on the basis of the consent of the website's target visitor. The visitor must therefore confirm that they consent to their data being viewed in personalized form on your website. To obtain consent, pslzme provides a special cookie banner that uses internal links to your website's imprint and privacy policy, among other things. To ensure that internal forwarding can take place without any problems, it is necessary to specify the ID of the respective pages in the configuration module. Please navigate to the menu item “Page structure” in the Contao backend to find the ID. Navigate to the required page and read in the ID under the edit point “Show page details”. Please enter both IDs in the fields provided under the menu item “Internal page configuration” and then confirm them again by clicking on the “Save” button.
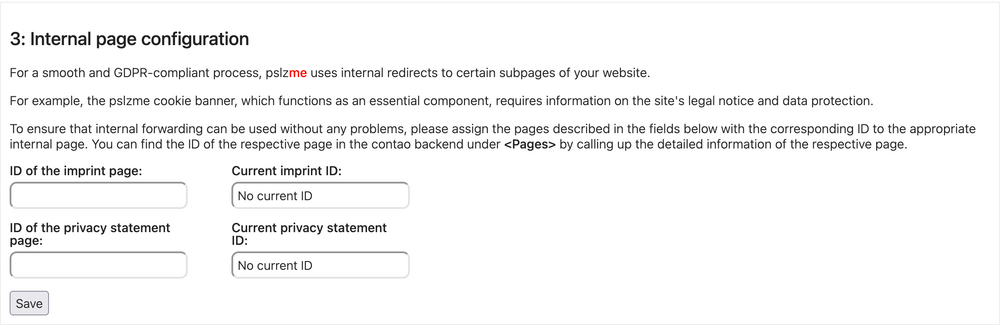
After confirmation, the respective IDs of the pages should be displayed in the fields “Current Imprint ID” and “Current Data Protection ID” below.
II.II Creation of front-end modules and connection to theme layout
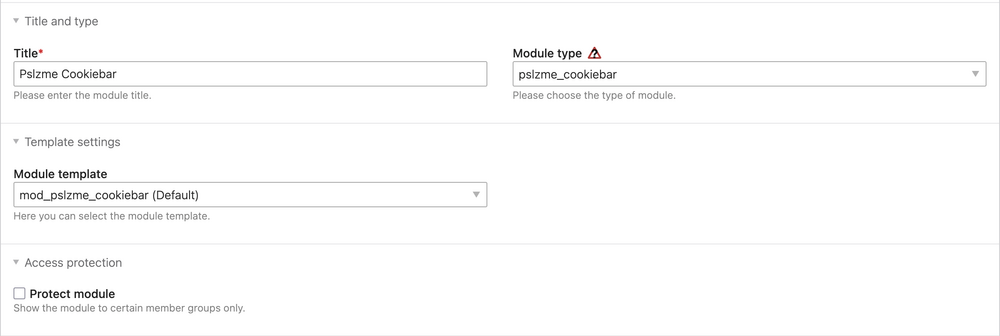
To use pslzme, various modules are required that must be integrated into the page layout used. To create these modules, please navigate to the menu item “Layout > Themes” of the Contao backend and use the editing option “Edit frontend modules of the theme”. In total, the four pslzme modules query_decryption, pslzme_cookiebar, pslzme_cookie_caller and pslzme_navigation are required, whereby the last one is optional and is only used if you want to use the specific page type “pslzme page”, which makes it possible to display only personalized pages. To create these front-end modules, please click on the “Create new module” option and then select one of the module types listed. Please enter a title to identify the new front-end module. For the naming, it is recommended to choose a name that corresponds to the module type, such as “Pslzme Cookiebar”. However, this is not mandatory. In principle, any name can be used. The remaining required modules can be created in the same way.
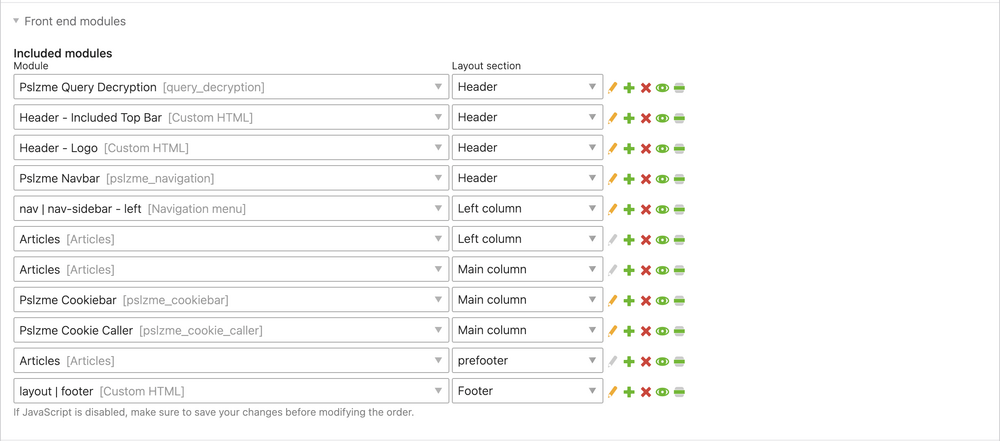
The created modules must then be integrated into each of the page layouts used. To do this, navigate again to the menu item “Layout > Themes” and select the option “Edit page layout of the theme”. Then select the desired layout and the “Edit page layout” option. Then scroll down to the “Frontend modules” editing field and duplicate one of the existing rows. As the first module, please select the one that you have created for the query_decryption type. Set the layout area to “Header”. It is of crucial importance that this module is at the top of all integrated modules in order to avoid unforeseen problems. Repeat the steps for the other two modules of type pslzme_cookiebar and pslzme_cookie_caller. Set the layout area of these modules to “Main column”. The position of these modules is arbitrary. If you want to use the specific page type “plszme page”, repeat the steps again for the module type pslzme_navigation. Set the layout area to “Header”. Finally, please confirm the changes by clicking the “Save” button. The full scope of the pslzme plugin can then be used.
III. Usage
III.I Creation of the pslzme link
You now have the option of personalizing your site for different visitors as you wish. This is implemented via special pslzme links. These links are specially tailored to the respective visitors, contain the desired personalization and are appended to your URL domain. To create these pslzme links, please navigate again to menu section "Login/Contact". This time, please log in to the “pslzme Login” area with your already assigned account. Then navigate to our link generator, which can be found in the navigation bar under the menu item “Generator > Link generator”. A special form is available there. This form is used to personalize your website later, depending on the data you enter in it. Please complete all the required fields on the form. The following explanation describes the individual options.
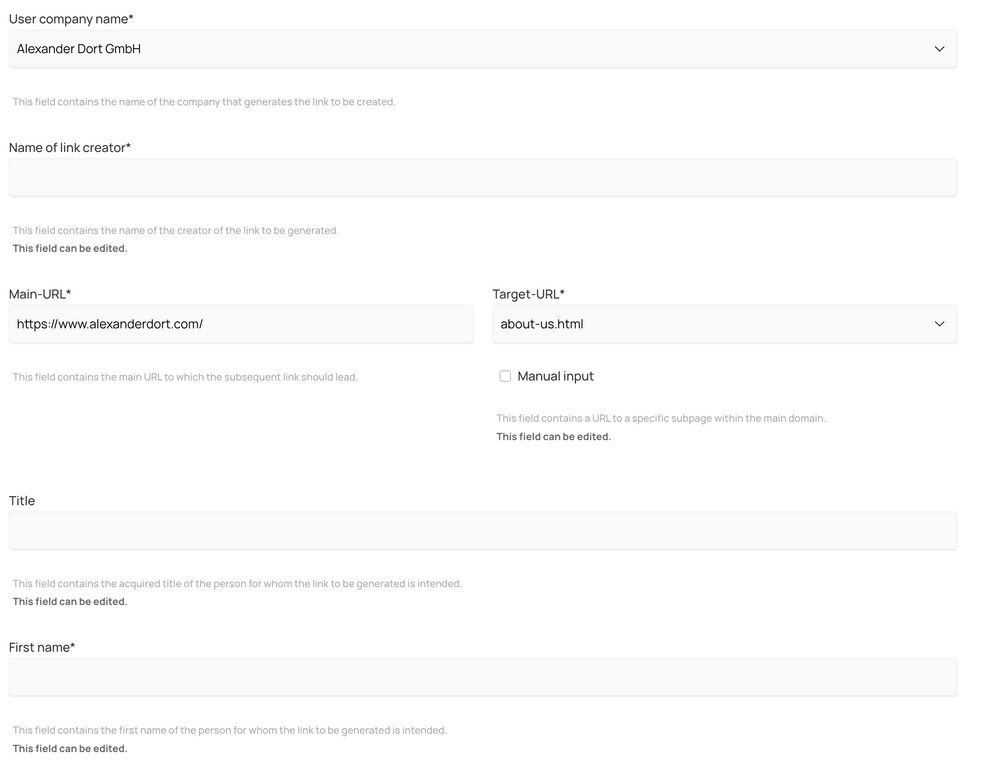
User company name:
This field displays the name of the company that generates the link to be created. As a rule, this field is already filled in and adapted to your company, which was specified when your account was created.
Name of the link creator:
This field contains the name of the creator of the link to be generated. If you are creating the link yourself, enter your full name here.
Main URL:
This field contains the main URL to which the subsequent link should lead. This field is also already set with your domain name, which was also entered when your account was created.
Target URL:
This field contains the URL to a specific subpage within the main domain. When creating your account, you also have the option of specifying various pages of your website that you would like to personalize. After specifying these pages, you can select them in this field. Alternatively, you can also enter one of your pages manually. To do this, please use the “Manual entry” option. Please note that this must be a URL that exists under your base domain. You cannot enter pages that are outside your base domain.
Title:
This field contains the acquired title of the person for whom the link to be generated is intended. If you are personalizing your page for a person who has a doctorate title, for example, you can enter this title here.
First name:
This field contains the first name of the person for whom the link to be generated is intended.
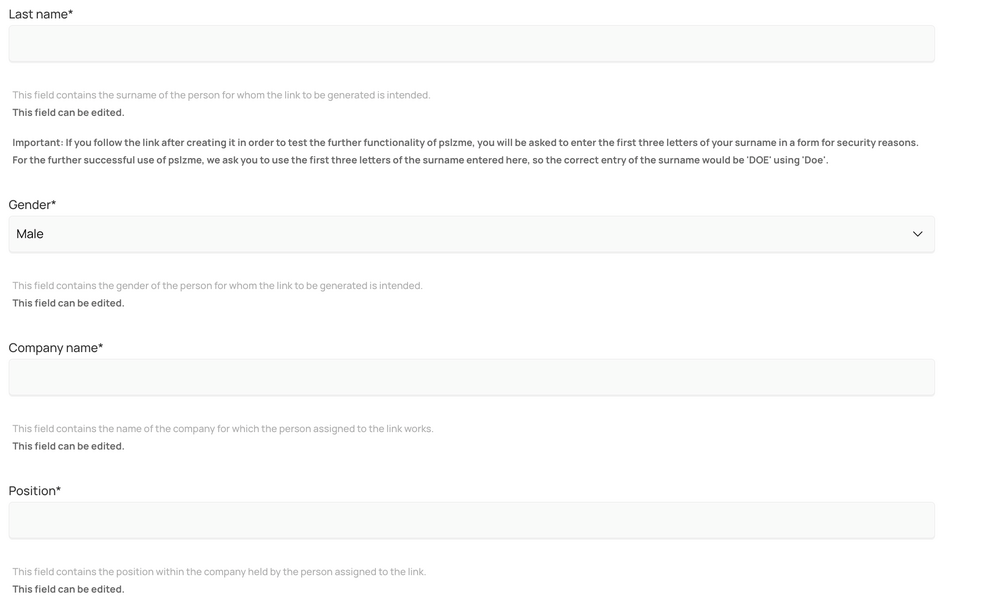
Last name:
This field contains the surname of the person for whom the link to be generated is intended.
Gender:
This field contains the gender of the person for whom the link to be generated is intended.
Company name:
This field contains the name of the company for which the person assigned to the link works.
Company gender:
This field contains the gender of the company for which the person assigned to the link works.
For the successful application of personalization, different cases (dative, accusative, genitive, nominative) are used in German, which change the following gender of the word depending on the sentence structure. For correct use, it is necessary to know the gender of the word to be changed. In this case, the gender refers to the company.
Position:
This field contains the position within the company held by the person assigned to the link.
Url of the company:
This field contains the URL which leads to the official website of the company, of the person assigned to the link.
First contact:
Information about how the assigned person first came into contact with the company that created the link. For example, if you came into contact with this person via a social media channel such as LinkedIn and would like to show this person your personalized website, please select the LinkedIn option here.
The detailed description of the fields can also be found again under each of the fields on this website inside the Link-Generator. Finally, click on the “Generate link” button. You will then be given three different options for the link. On the one hand, the Pslzme link option is available. This is used to provide the desired person with the link. The second option is the test link, which is intended for your own use. By following the test link, you will also be redirected to your desired domain. At this point, you have the opportunity to test the functionality. The reason for the test link is to ensure GDPR compliance, as mentioned above. This means that it must be proven whether the visitor has consented to the personalization or rejected it. If you use the original link to test the functionality, you can no longer prove this for your own website, for the intended visitor. The third and final option is the generated QR code. This can also be sent to the visitor. The code can then be scanned to redirect the visitor to the desired website.

At this point, it must be noted that all information you provide about the person in question in the respective fields is to be classified as public. All information must have been published by the potential visitor themselves or the explicit use of this information must have been confirmed to you. An example of this would be the provision of information in public social media channels.
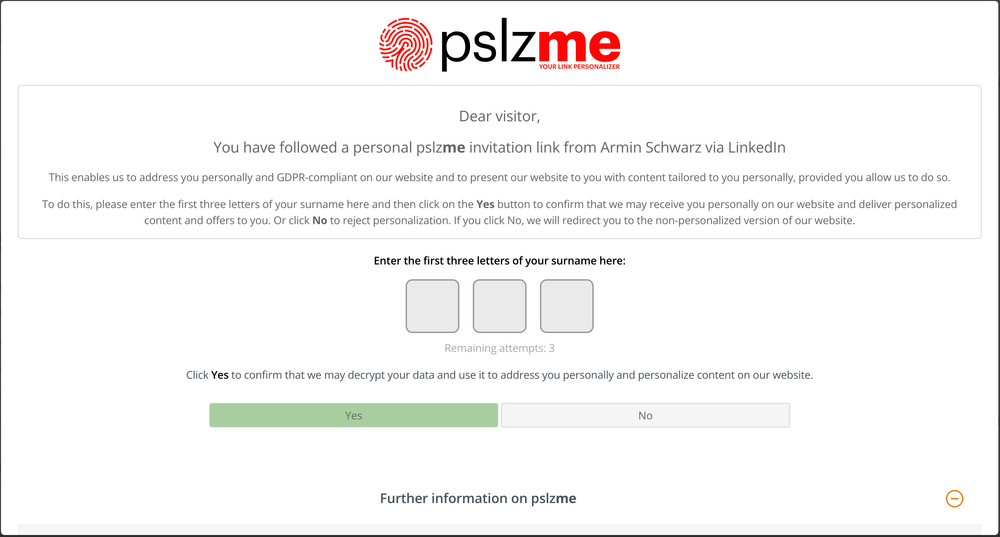
III.II Use of the pslzme cookie banner
If the visitor follows the link, they are first redirected to the cookie banner provided and previously integrated as a module. The banner itself initially contains some important information about pslzme and how it works. The visitor is then asked to enter the first three letters of their last name in the fields provided and to confirm the use of their personalised data by clicking “YES”. When entering the last name, this is the data that you previously entered in the “Last name” field when generating the link. So if you have selected the last name “Doe”, the correct combination of the user in the cookie banner would be “DOE”. If the visitor decides against personalization at this point, they will be redirected to the normal version of your website and the link sent will be completely removed from the URL. If consent is given, the visitor will be redirected to the page previously specified in the form in the Target URL field after entering the correct name. After arriving on the page, all the personalized elements you have prepared are available to the visitor. The ID of your site's imprint and privacy policy can also be found at the bottom of the cookie banner. By clicking on it, the visitor is redirected to the respective page.
The previously integrated cookie caller functions as a small slider menu that becomes visible when scrolling on the page. When a visitor clicks on this button, the cookie banner opens again. This also gives the visitor the opportunity to change their mind about personalization at a later date.
III.III Integration and use of pslzme elements
The plugin provides different types of pslzme elements that can be used depending on the use case. The elements are used as usual via the Contao backend in the “Articles” section. First of all, it is necessary to create a new article within a normal page. The name and layout area of the article are arbitrary and can be chosen individually. In the next step, a new content element is created within the article. The elements “Pslzme Text” and “Pslzme Content” are available for selection under the pslzme category. Both element types and their functions are explained below.
Pslzme Text:
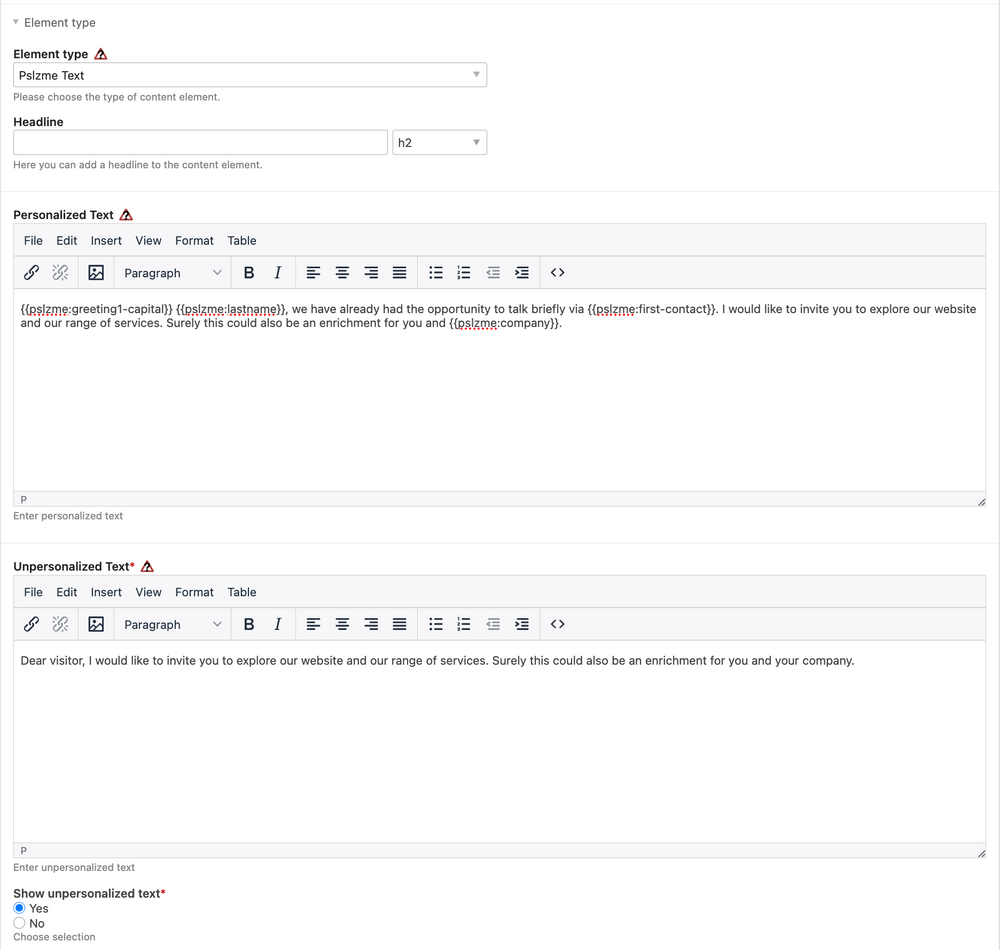
The "Pslzme text" type is used to display the values specified in the form on your website. Two configuration areas are available for this after selection. “Personalized text” and "Unpersonalized text". The element itself can also be used without the visitor's consent. In such a case, the text that you have entered in the “Unpersonalized text” text field will be displayed on the corresponding page. Please note that this area must always be filled in and must not be left blank. You also have the option of deciding whether this text should be displayed on the page or not. If you decide to display either a personalized text or nothing at all, you can click on the “Show unpersonalized text” option to make it invisible. If the visitor has agreed to personalization, the text in the Personalized text field is automatically displayed.
Contao includes the function to use various insert tags. These are recognized by the Contao backend via a certain spelling and translated and displayed accordingly. For example, the currently logged in user can be displayed via the insert tags user::firstname and user::lastname surrounded by double brackets. To display the specified form values, the plugin provides various of these insert tags specifically for pslzme. These must be called using the following notation:
{{pslzme:identifier}}
The identifier stands for the output of the corresponding form value. Below you will find a list of all available pslzme insert tags and their meanings.
III.III.I Output of the personalized variables using pslzme Text Article
Output of the personalized link creator:
{{pslzme:link-creator}}
Output of the personalized title:
{{pslzme:title}}
Output of the personalized first name:
{{pslzme:firstname}}
Output of the personalized last name:
{{pslzme:lastname}}
Output of the personalized gender:
Several different insert tags are available for the output of the gender. Each of these generates a different salutation depending on the gender and the currently set language preference.
{{pslzme:greeting1-capital}}
Output of the tag:
Language preference “de” and gender “male”:
=> “Sehr geehrter Herr”
Language preference “de” and gender “female”:
=> “Sehr geehrte Frau”
Language preference “en” and gender “male”:
=> “Dear Mr.”
Language preference “en” and gender “female”:
=> “Dear Ms.”
{{pslzme:greeting1-lowercase}}
Output of the tag:
Language preference “de” and gender “male”:
=> “sehr geehrter Herr”
Language preference “de” and gender “female”:
=> “sehr geehrte Frau”
Language preference “en” and gender “male”:
=> “dear Mr.”
Language preference “en” and gender “female”:
=> “dear Ms.”
{{pslzme:greeting2-capital}}
Output of the tag:
Language preference “de” and gender “male”:
=> “Werter Herr”
Language preference “de” and gender “female”:
=> “Werte Frau”
Language preference “en” and gender “male”:
=> “Dear Mr.”
Language preference “en” and gender “female”:
=> “Dear Ms.”
{{pslzme:greeting2-lowercase}}
Output of the tag:
Language preference “de” and gender “male”:
=> “werter Herr”
Language preference “de” and gender “female”:
=> “werte Frau”
Language preference “en” and gender “male”:
=> “dear Mr.”
Language preference “en” and gender “female”:
=> “dear Ms.”
{{pslzme:greeting3-capital}}
Output of the tag:
Language preference “de” and gender “male”:
=> “Lieber Herr”
Language preference “de” and gender “female”:
=> “Liebe Frau”
Language preference “en” and gender “male”:
=> “Dearest Mr.”
Language preference “en” and gender “female”:
=> “Dearest Ms.”
{{pslzme:greeting3-lowercase}}
Output of the tag:
Language preference “de” and gender “male”:
=> “lieber Herr”
Language preference “de” and gender “female”:
=> “liebe Frau"
Language preference “en” and gender “male”:
=> “dearest Mr.”
Language preference “en” and gender “female”:
=> "dearest Ms."
{{pslzme:Mr-Ms}}
Output of the tag:
Language preference “de” and gender “male”:
=> “Herr”
Language preference “de” and gender “female”:
=> “Frau”
Language preference “en” and gender “male”:
=> “Mr.”
Language preference “en” and gender “female”:
=> “Ms.”
Output of the personalized company name:
{{pslzme:company}}
Output of the personalized company gender:
Various insert tags are also available for the output of the company gender, which can be used depending on the sentence structure using the language preference. As different cases are used in German for dative, nominative, genitive and accusative depending on the sentence structure, this is unfortunately unavoidable for the German language. If the English language preference is used, there is no need to integrate the files, as the language modules used in the German language preference do not exist there. The output in this case would be “The” in the capital case and “the” in the lowercase case.
{{pslzme:company-gender-akk-capital}}
Output of the tag:
Language preference “de” and company gender “m”(male):
=> “Den”
Language preference “de” and company gender “f”(female):
=> “Die”
Language preference “de” and company gender “d”(neutral):
=> “Das”
{{pslzme:company-gender-akk-lowercase}}
Output of the tag:
Language preference “de” and company gender “m”(male):
=> “den”
Language preference “de” and company gender “f”(female):
=> “die”
Language preference “de” and company gender “d”(neutral):
=> “das"
{{pslzme:company-gender-dat-capital}}
Output of the tag:
Language preference “de” and company gender “m”(male):
=> “Dem”
Language preference “de” and company gender “f”(female):
=> “Der”
Language preference “de” and company gender “d”(neutral):
=> “Dem”
{{pslzme:company-gender-dat-lowercase}}
Output of the tag:
Language preference “de” and company gender “m”(male):
=> “dem”
Language preference “de” and company gender “f”(female):
=> “der”
Language preference “de” and company gender “d”(neutral):
=> “dem”
{{pslzme:company-gender-gen-capital}}
Output of the tag:
Language preference “de” and company gender “m”(male):
=> “Des”
Language preference “de” and company gender “f”(female):
=> “Der”
Language preference “de” and company gender “d”(neutral):
=> “Des”
{{pslzme:company-gender-gen-lowercase}}
Output of the tag:
Language preference “de” and company gender “m”(male):
=> “des”
Language preference “de” and company gender “f”(female):
=> “der”
Language preference “de” and company gender “d”(neutral):
=> “des”
{{pslzme:company-gender-nom-capital}}
Output of the tag:
Language preference “de” and company gender “m”(male):
=> “Der”
Language preference “de” and company gender “f”(female):
=> “Die”
Language preference “de” and company gender “d”(neutral):
=> “Das”
{{pslzme:company-gender-nom-lowercase}}
Output of the tag:
Language preference “de” and company gender “m”(male):
=> “der”
Language preference “de” and company gender “f”(female):
=> “die”
Language preference “de” and company gender “d”(neutral):
=> “das”
Output of the personalized position:
{{pslzme:position}}
Output of the personalized company URL:
{{pslzme:company-url}}
Output of the personalized first contact:
{{pslzme:first-contact}}
All insert tags can be used freely in the "Personalized text" field to make the visitor's interaction personal and interactive. For example, if you would like to use the sentences
“Dear Mr. Doe, we have already had the opportunity to talk briefly via LinkedIn. I would like to invite you to explore our website and our range of services. Surely this could also be an enrichment for you and John Doe Inc.”
the entry in the text field will look like this:
{{pslzme:greeting1-capital}} {{pslzme:lastname}}, we have already had the opportunity to talk briefly via {{pslzme:first-contact}}. I would like to invite you to explore our website and our range of services. Surely this could also be an enrichment for you and {{pslzme:company}}.
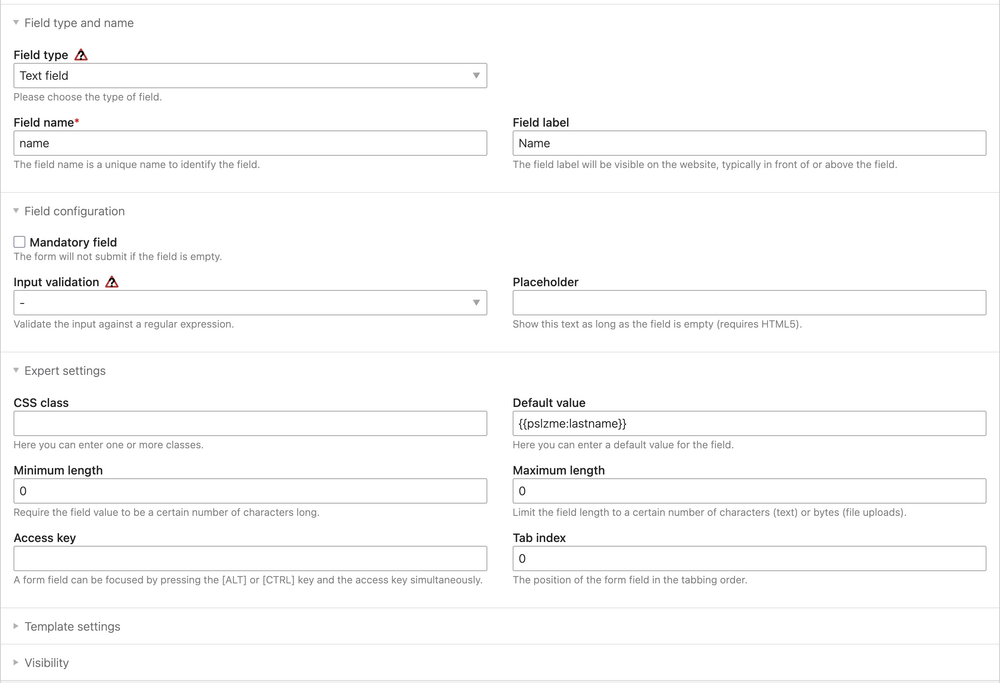
It is also possible to personalize internal forms with the help of pslzme insert tags. To do this, navigate to the Contao backend area “Content > Forms”. Select the form you want to personalize. Ideally, contact forms that you want to make available to potential visitors on various pages of your domain are suitable for this. Create all the required form fields such as name, surname and message. Contao now offers you the option of defining a default value for each of the fields. Use the listed pslzme insert tags at this point. If the field is to contain the visitor's surname, enter the insert tag {{pslzme:surname}} as the default value. For the first name, enter the insert tag {{pslzme:firstname}}. After integrating the form on the website and the visitor accepted the personalization, he will find the form already filled out with his contact details and only needs to attach the desired message.
III.III.II Output of personalized images and videos
Pslzme Content:
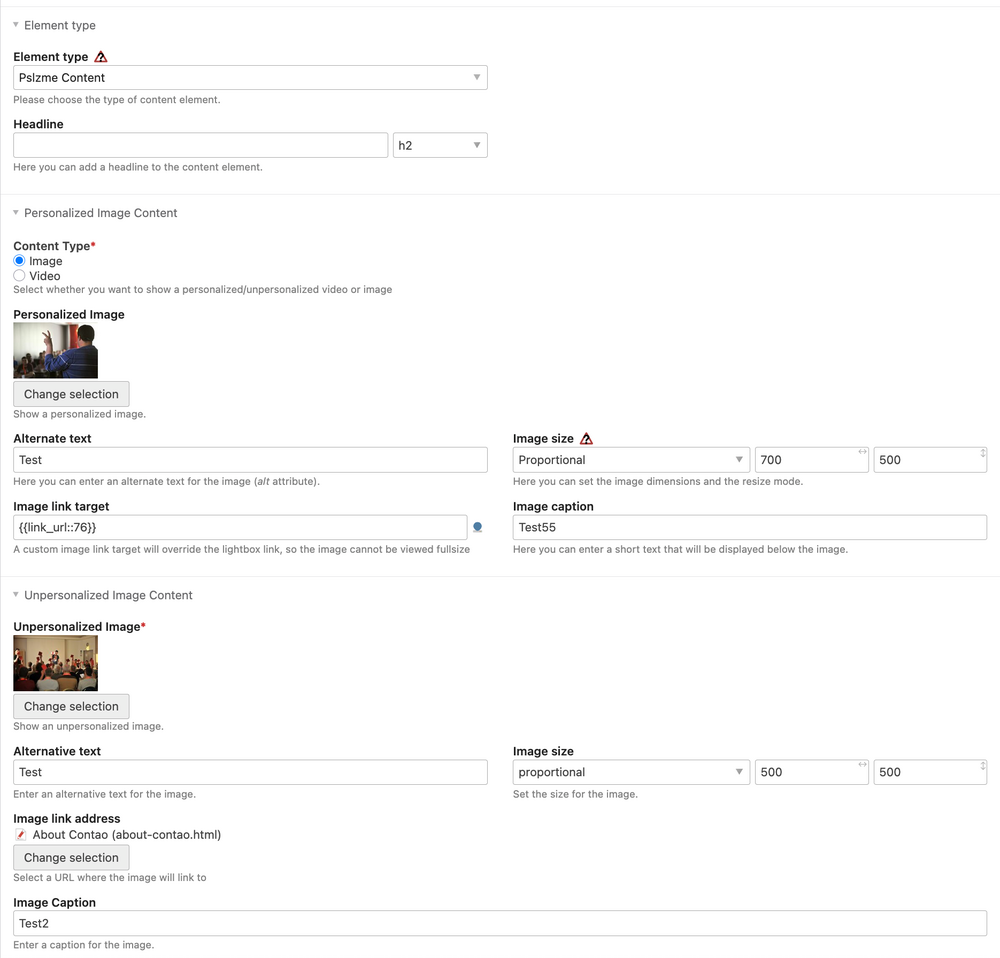
If you would like to show visitors certain images or videos instead, which are only displayed with the consent of the personalization, the "Pslzme Content" element type is available to you. In this element type, you can initially choose between image and video within the content type option. Different configuration options are loaded depending on the selection. When you select “Images”, two different groupings are displayed. Personalized image content and Unpersonalized image content. The functionality is also similar here, which is why the image of the non-personalized content must always be specified. Otherwise, the functionality is similar to that of the original contao element type Image. By selecting the file manager, you can select an image and assign a format to it via the image size. In addition, a caption, an alternative image text and an image link address to which the image refers can be specified. The personalized image is also automatically used here in the case of personalization.
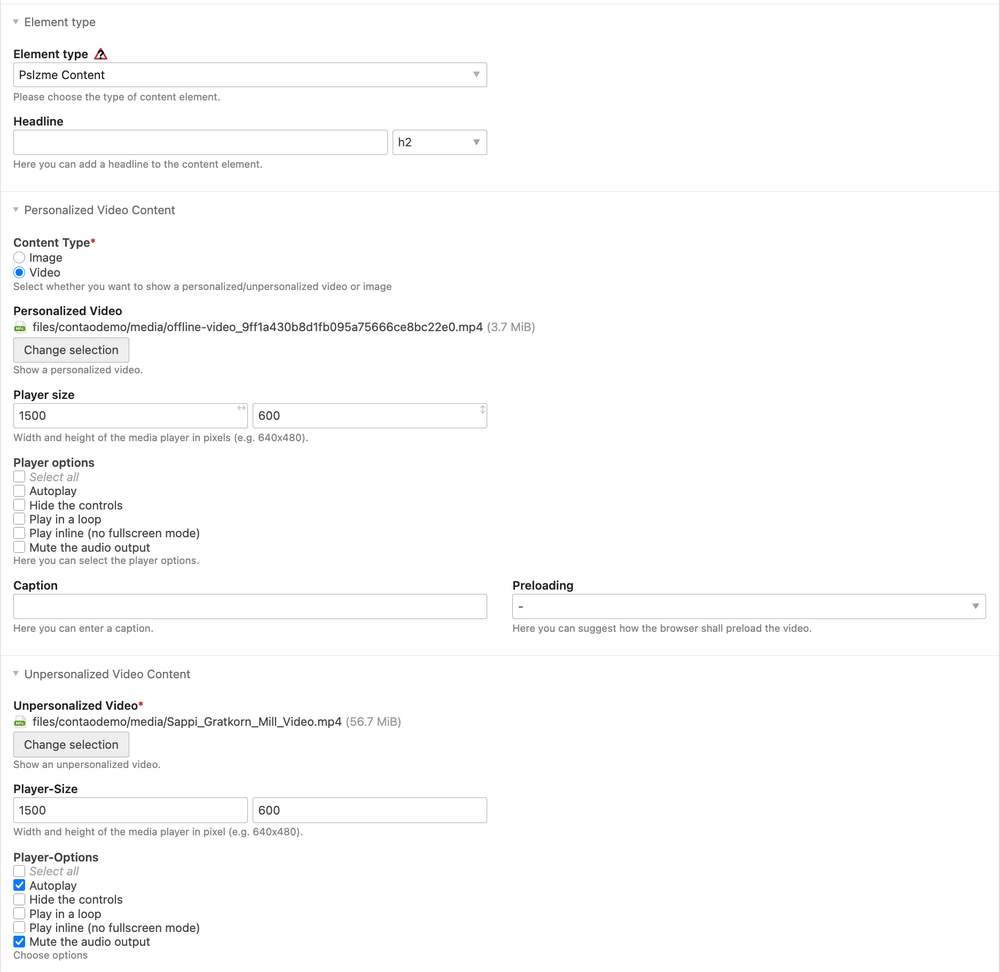
The procedure is similar when selecting the “Video” content type. Here you select a video file (mp4, webm) instead of an image. You can then set various video player options here too.
III.III.III Use of special pslzme pages
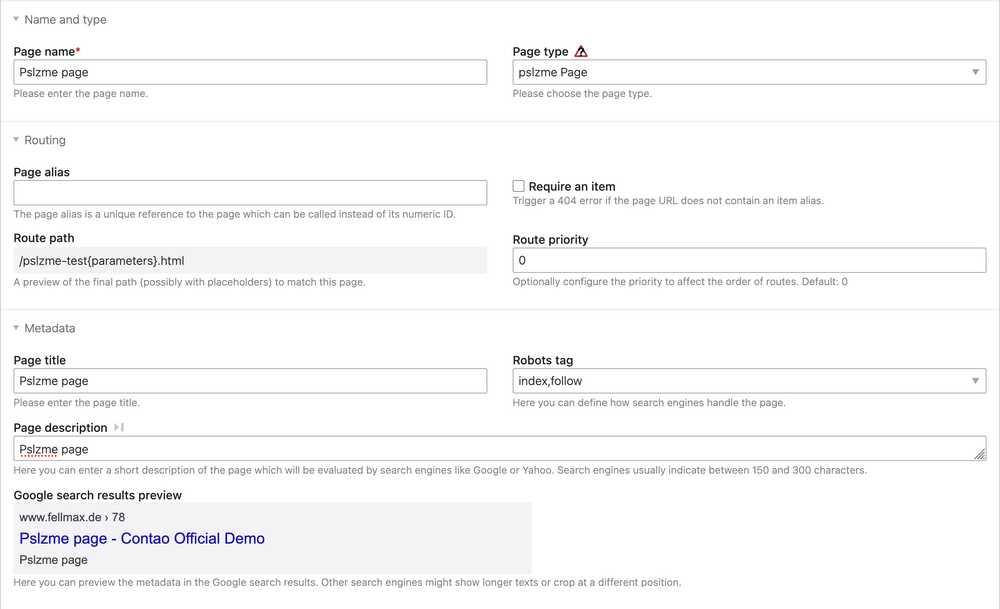
As mentioned, it is also possible to use a special page type "pslzme page" after integrating the pslzme_navigation module. These pages are to be regarded as fully personalized pages that are only visible to visitors if they agree to the personalization. Otherwise, these pages will not appear in the navigation. This opens up the possibility of making your website a little more dynamic. For example, you can include or hide personalized pages that contain personalized 3D content or similar elements that have been specially developed for a visitor and would not work without personalization. To use this special page type, please navigate to the Contao backend area “Page structure”. There, use the “Create new page” option to create a new page within your main page. Enter the various required details such as page name and title as usual. Now select “pslzme page” as the page type. The personalization is assigned by selecting this page type. You can then fill the page with various items as usual. All pslzme element types are also freely available here.
Contact
Would you like to purchase the plugin? Then contact us without obligation and we will get in touch with you.